Crowned Control
Devlog #01: Research
Introduction
Hello everyone and welcome to our first devlog!
We are a group of 5 students, studying at Howest, Digital Arts and Entertainment (DAE) in Kortrijk, Belgium and here we will document the development of our couch co-op game.
Our team consists of 3 students from the Game Graphics Production major: Quentin Dejaeghere, Abdullah Serbest and Dayell de Graaf, 1 student from the Game Development major: Joren Dresselaers and 1 student from the Sound Design major: Gilduin Stevens.
Our game revolves around playing as a knight in which the goal is to obtain the crown and have it in your possession for the longest period of time. But keeping the crown won't be as easy as it sounds. The players will have to avoid traps activated by others as well as avoid getting pushed into traps by each other to avoid losing the crown and missing your opportunity to become the next ruler of the land!
To start off this development update, we will bring you through our initial research. In order to keep our Devlogs organized, we'll be splitting them into 2 main sections; Art and Programming.
Art
Theme
Right now we are focusing on gathering as much reference and ideas to create a mood board for our game. This will serve as a base for our style guide in the future.
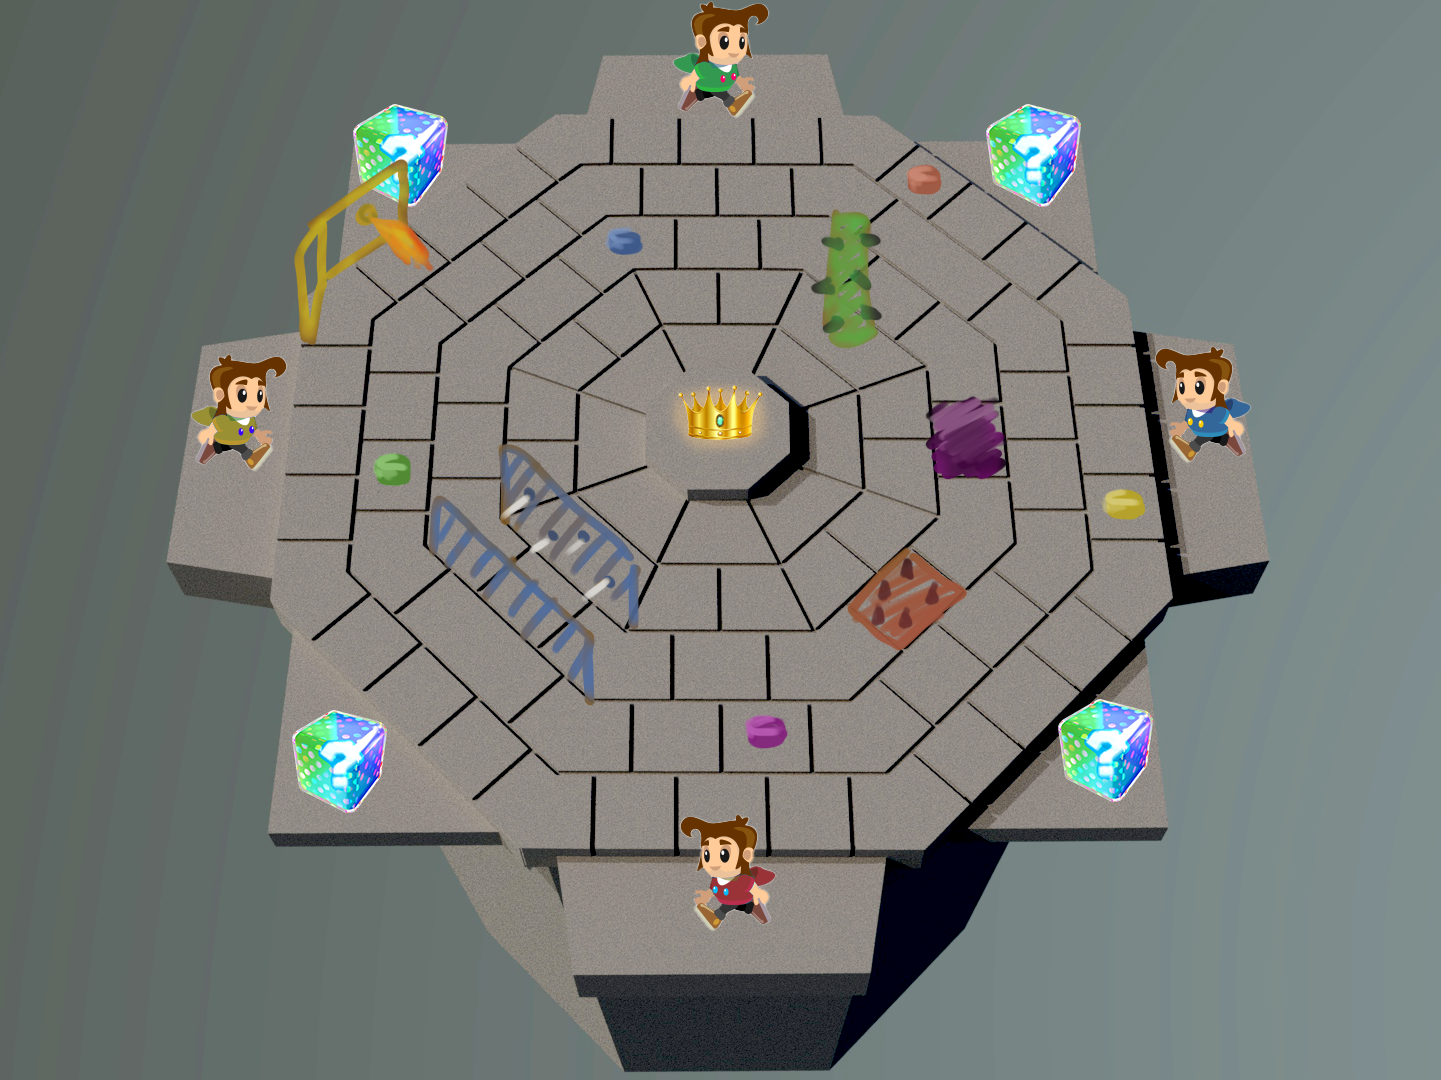
The art style of the game will most likely be very stylised. We intend for the game to have a top-down view, so having stylized features will enhance the readability of the level. The textures of the models for both the characters and props will be made with a combination of hand painted and stylised designer textures. Tests for creating a toon shader with an outline have been conducted this pack. An outline will make it more clear what the focus points of our game will be. We like the idea of visualizing which traps can be activated by which buttons, most likely with the help of a clear colour scheme. The background will be moody and desaturated in atmosphere so that the centre of the level can be clearly lit up.
A few trials have already been conducted with rigging/animating a simple block- out character and trying out if we can get them to be playable in both Unreal and Unity.
Shaders
Basic Shaders tests have been prototyped in Unreal Engine 5.1.1. Since we aimed to achieve a toon shader effect, there was a need to analyse what made a toon shader look the way it looked. Essentially, while realistic shading has a smooth transition from lit to unlit areas, toon shaders utilize a threshold to make a relatively harsh distinction line between lit and unlit. The tests showed that a strong direct source of light is best suited for the calculations done in this shader and generated better results than ambient sources of light.
There was also a desire to give some of our meshes a distinctive outline. On technical level, this is basically an analysis done per pixel. Based on a determined threshold value, a value difference check is performed on each pixel by comparing it with the pixels above, below, right and left. Once the value difference reaches the threshold, an outline will be drawn. The analysed value can refer to depth of the pixel, normal of the pixel, the grayscale colour value, etc.
Some unexpected side-effects manifested. For example the colour of the lights seemed to disappear with the technique used in the material setup. As you can see in the two images below, the warm tone of the light seen in the left image gets lost in the calculations of the toon shade rendering. At the moment, there doesn’t seem to be an immediate obvious solution for this except for reintroducing a portion of the original non-converted pre-results into the toon end-results.
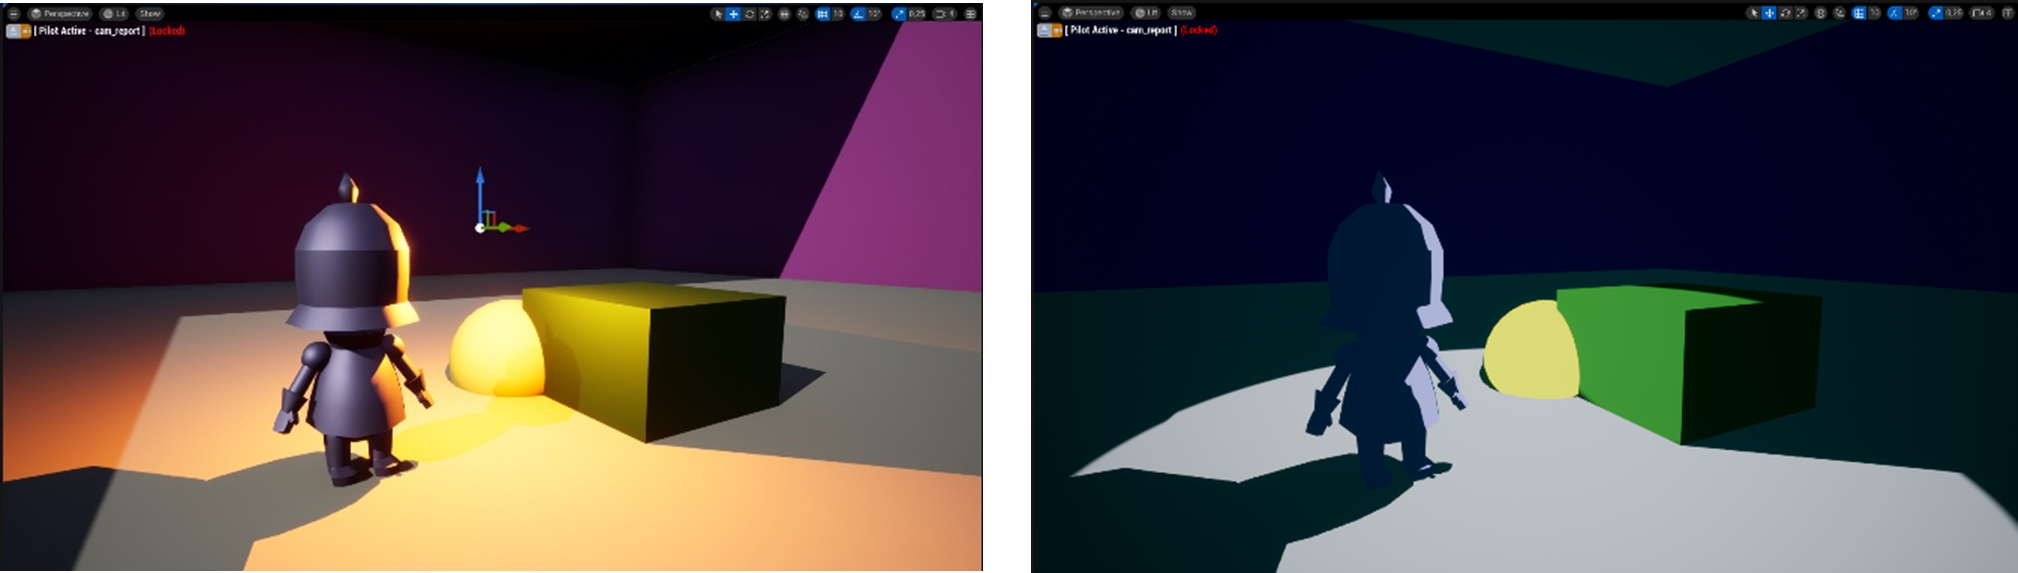
Another oddity that occurred was when we tried to apply the toon shading on a particular mesh, the silhouette of this mesh became visible when there was another object between the viewer and the aforementioned particular mesh. You can see this in the image below (left). While not really sure why this x-ray vision occurred, the issue seemed to have been solved by simply subtracting A from B, with A being the distance between the pixel of the selected mesh in the viewport (even if it is behind something else) and the viewer and B being the actual fully rendered pixel in the viewport (and not the silhouette) and the viewer. If the result was negative, the toon shader would not be rendered and the silhouette would disappear (see the image below, the right one).
Another strange artefact occurred with the lighting in occluded areas. The light seems to jittering about. After some research, it became clear that the global illumination Lumen was causing this. Once we disabled this, the artefacts disappeared immediately.
We were able to render outlines as well. There seems to be an odd render issue that still needs to be fixed. It occurs when the viewing vector becomes more parallel with the plane containing this error.

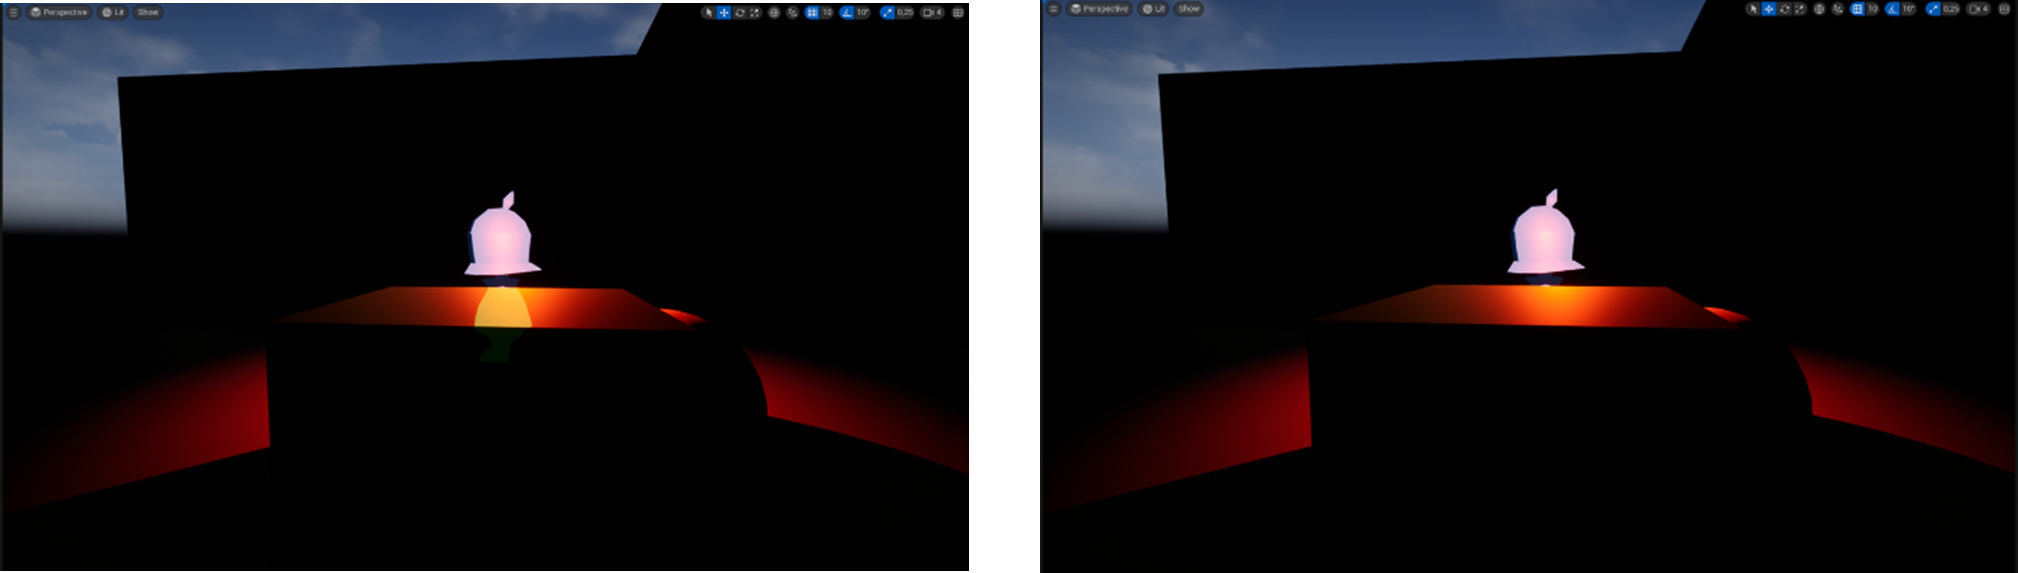
There were some attempts to basic particle effects with the use of Fresnel nodes. These need to be improved. The intent is to only make the outer silhouette line pulsate, not the inner edges as well. Odds are that this effect might actually be solved by using the earlier mentioned outline material in conjunction with Custom Depth option per mesh (instead of an actual particle effect).

The current state compared to the initial state is visible on the following two images.

Rigging
A quick trial of rigging the block-out character with Mixamo was also done and added into both Unreal and Unity to get accustomed to the pipeline.

What's next?
- Explore shaders and texture rendering looks.
- Explore level layouts and trap interactions.
- Determine level scale.
- Most likely start on creating an art bible.
Programming
Mechanics
This week we focused on prototyping some of the core mechanics in Unity, to gain a sense of how doable they will eventually be in the full game.
Let’s start with a quick overview of the main mechanics we’ll be needing and how they were prototyped so far:
Movement, this is core to everything we’ll be working with, so we want it to feel smooth and snappy.
To test this, we started out with adding simple horizontal movement, coupled with a dashing ability.
Secondly: attacking. We want to be able to push back other players and damage the crown holder. To facilitate this, we placed a trigger volume in front of the player character, which will check for attackable objects inside itself. When clicked, we apply a force outward from the attacking player, onto the pushed one.
Items will also be important, so we tried out a system to gain items when you collide with boxes. The items themselves will be worked out later, but having a system in mind for collecting them will certainly be necessary.

Next up, we wanted to try out a possible way to get the crown to move away from players, so we made a rudimentary system that keeps track of every player’s position, calculates the average, and runs away from that point.

Lastly, we implemented a way for traps to be placed in predetermined points. This is done by placing objects around the scene that can be interacted with by the players. By interacting, the trap location gets a specific trap assigned to it, and will spawn that for a few seconds. This way the map won’t be filled by permanent traps nearly instantly after the game begins.
All of these are testable in the prototype build included on our main page in case you would be interested.
Animations
We tried out all different types of animation trees, after a lot of trial and error we landed on simple a 2D animations tree. With controller inputs we can scale the acceleration time with how heavy the player is tilting the analog stick, resulting in a fast or slow wind up or even staying in walk.
We don’t need a verry elaborate tree going to make our stylized characters move. To make it as snappy as possible we will use a short initial start-up time. This way you still have the intent to move but it will respond at a moment’s notice and make the watch experience smooth and enjoyable.
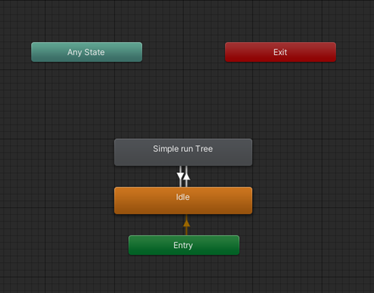
This simple tree structure can be expanded with almost 0 effort to fit our needs for animations.
What's next?
- Level interaction
- Implementing controller support
- Multiplayer
- Recreate these prototypes in Unreal Engine and compare them
Throughout the next week we will focus on getting the mechanics fully prototyped in Unreal as well. Once we have the prototypes in 2 different engine ready, it will be time to decide which engine to choose to hop into the production phase. After we've chosen our preferred engine, we'll start by combining the previously prototyped mechanics in order to get a playable demo ready by the end of the week.
Thanks for reading our Devlog and stay tuned for future updates!
Leave a comment
Log in with itch.io to leave a comment.